This article may contain affiliate links. If you buy through them we may earn a commission at no extra cost to you.
Caulking a bathtub takes 30–45 minutes of hands-on work, costs $10–30 in materials, and lasts 3–5 years when done right. The job has three parts: removing old caulk, applying a clean bead, and waiting the full cure time before you run the water. Shortcut any of those and you’re back here in six months.
Why Caulk Fails—and What You’re Preventing
The gap between a tub and the surrounding wall moves. Tile and drywall expand and contract with temperature and humidity; so does the tub itself, especially a fiberglass one under the weight of a full bath. Grout is rigid and cracks in that joint within a season or two. Caulk is flexible—it absorbs that movement without opening a seam.
Once water gets behind the wall, it doesn’t announce itself. By the time you see staining or soft drywall, you may be looking at $500–2,000 in repairs. I recaulk my tub every 3–4 years. The first sign it’s time: caulk pulling away from the corner, or dark streaks that don’t scrub off.
Tools and Materials
- Caulk gun ($8–15): A basic ratchet-drive gun handles this job fine. Battery-powered versions ($30–60) reduce hand fatigue but aren’t necessary for a single tub.
- Caulk ($5–20 per tube): Silicone or acrylic latex—see the choosing section below, or our full guide on the best caulk for kitchens and bathrooms.
- Caulk removal tool or putty knife ($3–8): For scraping out the old bead.
- Utility knife ($5–10): To trim the nozzle at the right angle.
- Painter’s tape ($4–6): Gives you a straight edge without a steady hand.
- Wet sponge or caulk finishing tool ($2–5): For smoothing.
- Rubbing alcohol or mineral spirits ($4–8): Cleans the joint before you apply and cleans silicone off your tools after.
- Rags or paper towels: For wiping excess.
Prepare the Surface
Remove old caulk
New caulk won’t bond to old caulk. It has to go. Use a caulk removal tool or putty knife held at roughly 45 degrees and push rather than pull—you get more control and are less likely to gouge the tub surface. For caulk that’s hardened and brittle, a caulk softener product ($8–12) applied for 30 minutes makes scraping significantly easier. Our article on how to remove old caulk cleanly walks through stubborn cases.
Clean and dry the joint
Scrub the bare joint with rubbing alcohol and a cloth to lift soap scum, mold, and mineral deposits. Any residue left behind will prevent adhesion. Dry with a clean cloth, then let the area air out for at least 30 minutes—longer in a bathroom without good ventilation. The joint needs to be completely dry before caulk goes on.
Tape the edges
Run painter’s tape along both sides of the joint, about ¼ inch back from the gap. Press it down firmly so caulk can’t bleed underneath. The tape isn’t just cosmetic—it lets you focus on filling the gap evenly rather than worrying about a straight line.
Cut and Load the Tube
Cut the nozzle at a 45-degree angle. Start small—a ¼-inch opening is right for most tub joints. You can always widen it, but a hole that’s too large produces a bead too thick to smooth neatly. Pierce the inner foil seal with a nail or the rod on your caulk gun, load the tube trigger-end first, and test the flow on a piece of cardboard. Different guns require different trigger pressure, and a quick test tells you what to expect before you’re working against the joint.
Apply the Caulk Bead
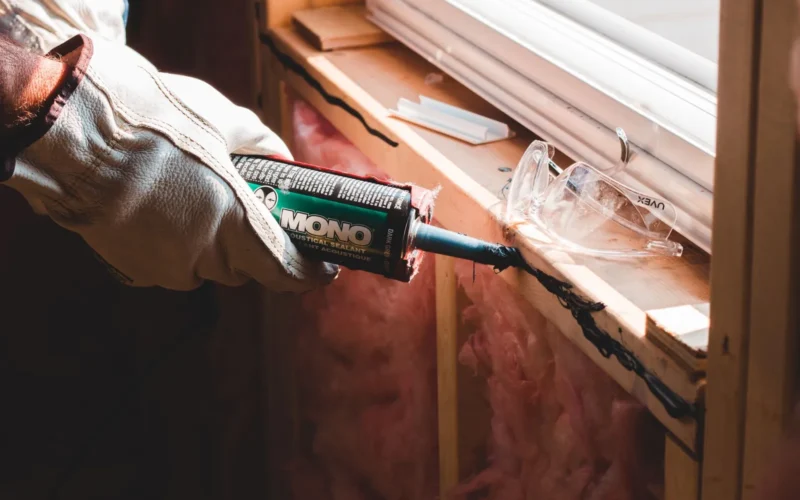
Hold the gun at 45 degrees with the nozzle angled into the gap. Squeeze the trigger with steady pressure and move along the joint in one continuous pass. The right pace lets you watch the caulk fill the gap as you go—roughly 6–10 inches per second for a standard tub joint, though that varies with gap width and gun pressure. Moving too fast leaves voids; too slow and you get a bead that’s too thick to smooth cleanly.
Do the long sides first, then the short ends. Stop at each corner and restart on the next side rather than trying to turn the corner mid-bead—corners done separately are easier to smooth and look cleaner.
A single, smooth pass beats multiple passes; reapplying caulk over mistakes creates a lumpy, uneven bead.
Smooth and Remove the Tape
While the caulk is still wet, run a wet fingertip or caulk finishing tool along the bead with light, consistent pressure. Dip in water every few inches. Smoothing does two things: it presses the caulk deeper into the joint for better adhesion, and it creates a slightly concave profile that sheds water instead of pooling it. Most caulk stays workable for 10–15 minutes after application.
Wipe away any squeeze-out with a damp cloth, then peel the painter’s tape off while the caulk is still slightly tacky—not wet, not cured. Pulling tape from fully cured caulk can tear the edge of the bead. If you’ve waited too long, score along the tape edge with a utility knife before peeling.
Curing Time and Aftercare
Silicone caulk typically takes 24–48 hours to cure fully; acrylic latex is usually ready in 12–24 hours. Check the label—cure times vary by brand and bead thickness. Don’t use the tub during that window. Water on uncured caulk weakens the bond and can leave gaps that are invisible until they leak.
Once cured, keep the bathroom exhaust fan running during showers and for 20–30 minutes after. That single habit does more to extend caulk life than any mold-resistant product. Wipe down the tub surround with a squeegee or cloth to reduce standing water on the bead.
Silicone vs. Acrylic Latex: Which to Use
| Feature | Silicone | Acrylic Latex |
|---|---|---|
| Water resistance | Excellent | Good |
| Flexibility | High | Moderate |
| Lifespan (wet area) | 5–10 years | 2–5 years |
| Paintable | No | Yes |
| Cleanup | Mineral spirits | Soap and water |
| Ease of application | Trickier to smooth | Easier |
For a bathtub surround, silicone is the better material. The extra durability and water resistance are worth the messier cleanup. Use acrylic latex only if you need to paint over the bead—say, where the tub meets a painted wall rather than tile.
Frequently Asked Questions
Can I caulk over old caulk?
Not reliably. New caulk won’t bond well to old caulk, and if the old material is already failing, the new layer will follow. Removing the old bead adds 15–20 minutes but is the only way to get a seal that lasts.
What if my caulk bead looks uneven?
Catch it while wet and smooth it with a damp tool or fingertip. If it’s already cured and the seal is intact, leave it—uneven doesn’t mean leaking. If there are visible gaps or holes, remove that section and re-caulk. Patching over a gap rarely holds; cutting it out and starting fresh takes about the same time and works.
How do I prevent mold on caulk?
Mold needs moisture and warmth—both common in bathrooms. Run the exhaust fan during and for 20–30 minutes after every shower. Wipe down the tub surround to remove standing water. Mold-inhibiting caulk formulas help at the surface but aren’t a substitute for ventilation; a poorly ventilated bathroom will grow mold on any caulk eventually.
Can I use grout instead of caulk at the tub joint?
No. Grout is rigid and will crack as the tub flexes under load and temperature changes. That joint is specifically where building codes and tile industry standards call for caulk. Grout there will fail within months and let water straight into the wall.
How do I know when it’s time to recaulk?
Look for caulk that’s pulling away from the tub or tile, dark discoloration that doesn’t scrub off (mold growing beneath the surface), or a bead that feels hard and brittle rather than slightly flexible. Any of those means it’s time. In a regularly used bathroom, plan on recaulking every 3–5 years regardless of how it looks.

Rob is a former carpenter who now explains home repairs so you only have to do them once.